Learning Git: Part 3
This is a three-part series to help you get started and advanced with Git Rebase, Revert, Tag and Tickets. For any developer, Git is an essential tool to learn.
So far in the three-part series of Git, until now we have covered
Git: Part 1, We looked at Version Control Systems, States, Creating new projects and working on remote repositories.
Git: Part 2, We looked at Branching, Merging and Resolving Merge Conflicts.
In this Part, We’ll focus at Git Rebase, Tag, Revert and Tickets. Hit the subscribe button below before moving ahead!
When it comes to integrate changes from multiple branches into one, there are two options that developers can choose from, Git Merge and Git Rebase. Both of them serve the similar purpose of reflecting the commits. It is often a dilemma for developers to choose from the two. In this article we will focus on Git Rebase what is it exactly, when and why should you use it.
Git Rebase
Rebase basically compresses all changes into one. The primary purpose of using Git Rebase is to maintain a linear project history.
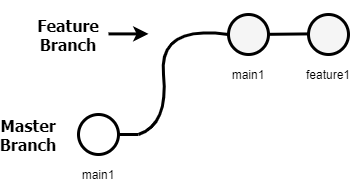
Let us consider there are two branches ‘Main’ (master) and ‘Feature’. Main branch is where all the actual workflow of the project or codebase takes place. Feature branch is the one on which you’re working on in your local repository.
Assume that we are currently working on our feature branch
The feature branch that has two commits.
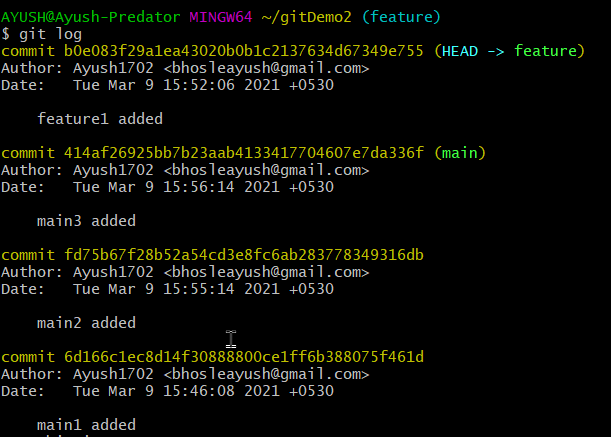
In the meanwhile your coworkers/teammates have pushed new commits (main2 and main3 for example) onto the Main branch which means your feature branch is two commits behind and hence in order to catch-up with the newest changes on the Main branch we can simply rebase with the following commands-
git checkout feature
git rebase main
Successfully rebased and updated refs/heads/feature.
So now when we check our feature branch with git log command, we can see our feature branch has rebased with the newer commits made on main branch
Which in end will look like:
While it is advised to use Rebase only to commit changes locally and not Rebase public branches. Rebase has caveats of Merge Conflicts if there are multiple people working on a branch (public branches) as it rewrites history and can be difficult to track and resolve.
Git Tag
Tags are used to label a particular point within Git History to mark it as a relevant or stable commit. Tags are usually denoted by something like v1.0 but you can name anything here. By default tag is created where HEAD refers to. Choose a branch and simply hit the command below to create a tag.
git tag <tag name>You can similarly create annotated tag with a message similar to the git commit command by
git tag -a v1.1 -m "Temporary tag added"To list all the tags created
git tagTo delete a Tag
git tag -d v1 You can give tag to a custom commit by referencing the SHA value of that commit to git tag, to view all the SHA value of the commits -
git log --pretty=oneline From the output you can choose whichever commit that has to be tagged
git tag -a <tag name> <SHA value>Git Revert
In simple words, Git Revert is used to rollback to your previous commit by creating a new commit so that the history is maintained which makes ‘revert’ a safer option. Let's say you discover a problem within the latest commit, you can simply undo the problematic commit by revert command -
git revert HEADYou can enter a metadeta denoting the reason/issue and it’ll create another commit where the change state rolls back to the previous commit. But for the changes to be reflected it also has to be Pushed to the remote again so that you can let your team know about the changes. To see the new commit at the top using-
git log --onelineGit Tickets
Git Tickets are simply for tracking the underlying ‘issues’ that are to be fixed in the repository. While Issues here can be to fix a bug, enhance the code, correction in documentation etc, with a small description of it. You can also use the previous Issues or Pull Requests denoted with ‘#<number>’ as a reference to a new issue. You can create your own issue/ticket as well on public repositories.
It also allows to tag the issue with a particular label that are created by the owners of the repository. For a better workflow within your team, you can assign your teammate on a particular issue/ticket label (colorful text in the image below)
We hope you liked your work. It will be great if you can give us a heads up. Join us for more such content and stay updated!


